Abrasimètres
rotatifs Taber® 5130 & 5150
Please
click on an accessory for further information.
| Grit
Feeder Model 155/255 - Three-Body
Abrasion Testing |
| Expand
testing methods for Taber® Rotary Abrasers. |
| The
Grit Feeder is used to evaluate three body abrasion caused
by the destructive action of fine hard particles. Loose
grit passes under a pair of leather clad brass wheels, and
serves as the abradant. The resulting rolling action of
the particles contributes to the physical breakdown of materials. |
| Instrument
evenly distributes grit particles. |
| Positioned
over a Taber® Rotary Abraser, this freestanding
unit deposits aluminum oxide grit particles uniformly and
continuously, at a specified rate. After passing under the
leather wheels, used grit and any abraded material is removed
by the Abraser vacuum system. |
| Two
models offer simple set up. |
| Mounted
off the left side of the Abraser, Model 155 utilizes an
alignment guide screw to set the position of the instrument.
Grit distributor and vacuum removal nozzle heights are adjusted
using a thumbscrew. An alignment block is incorporated into
the base of Model 255, to ensure the correct location of
the grit feeder in relation to the Abraser. With the ability
to mount on either the right or left hand side, two instruments
can be used in conjunction with the Taber® Dual
Rotary Abraser. A telescoping feature allows precise height
adjustments, and permits testing of thicker specimens, up
to 50mm (2 inches). |
| |
|
|
| Micro-Abrader
Model 8000 - Micro-Particle Erosion and Wear Abrasion
Testing |
| Precision
controlled air system ensures exact results. |
|
Micron-sized abrasive powder is mixed with pressurized air
to generate the abrasive flow. Equipped with a patented
modulator system, the instrument uses stabilized clean air
to deliver the powder in a steady and consistent flow. |
| Micro-Abrader
system offers testing versatility. |
| Micro-Abrader
system offers testing versatility. Of the different variables
for erosion and wear testing, the characteristics (size,
shape and hardness) of the abrasive powder is the most significant
for determining how aggressive the wear process will be.
Other system factors that can be optimized for each material
include: air pressure, rate of powder flow, nozzle orifice
and design, duration of test, angle of abrasive stream to
the specimen, distance between the nozzle and specimen,
and dust collection. |
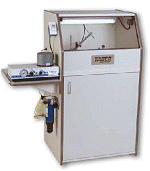
| Workstation
provides clean testing environment and storage area. |
| Integral
to the system is a workstation to confine the abrasive powder
and maintain a clean test area. A dust collection system
is used to remove the media during testing. Illuminated
by a fluorescent lamp, the test area is viewed through a
hinged, tempered glass window that is sloped for maximum
visibility and reduced glare. |
| Test
where you never thought possible. |
| With
interchangeable nozzles and abradants, there is tremendous
versatility. In addition to external surfaces, you can test
the internal surfaces and extremely delicate materials.
Plus, you can use the system to clean, cut, deburr and drill. |
| |
|
 |
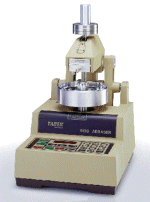
| Multi-Media
Abraser Model 5500 - Particle Abrasivity Testing Attachment |
| Simple,
accurate abrasivity testing for fluids, powders and semi-solids. |
|
The Multi-Media Abraser provides a flexible tester for measuring
abrasivity of virtually all fluids and powders used in todays
manufac-turing processes. Applications include paints, pigments,
adhesives, sealants, epoxies, pastes, detergents and industrial
additives. |
| Recreates
wear conditions for your application. |
| Able
to recreate actual wear conditions, the Multi-Media Abraser
allows testing on all contact surfaces in application equipment,
including rods, cylinders, nozzles, gears and other moving
parts. |
| Workstation
provides clean testing environment and storage area. |
| Integral
to the system is a workstation to confine the abrasive powder
and maintain a clean test area. A dust collection system
is used to remove the media during testing. Illuminated
by a fluorescent lamp, the test area is viewed through a
hinged, tempered glass window that is sloped for maximum
visibility and reduced glare. |
| Works
with all standard Taber® Abrasers. |
| Works
with all standard Taber® Abrasers. The Multi-Media Abraser
is available as a separate attachment or pre-mounted on
a single or dual Taber® abraser. |
| |
|
 |
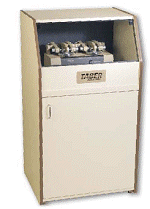
| Quiet
Cabinet |
| Reduce
noise levels associated with the Taber® Rotary Abraser operation. |
|
Reduce noise levels associated with the Taber® Rotary Abraser
operation. The typical sound level of operating a Taber®
Abraser and its vacu-um system can reach 78dB. Utilizing
sound deadening materials, the Quiet Cabinet reduces this
level up to 20%. The result is a noise level comparable
to a standard office environment, and enables a normal conversation
to be conducted in the vicinity of the testing. |
| Re-designed
for optimal performance. |
|
The upper cabinet features a hinged Plexiglas viewing window
to monitor testing. A detachable front permits easy transfer
of the Abraser into or out of the cabinet. Plus, side vacuum
hose openings (left or right) allow the top to be used as
a standalone cabinet. The lower cabinet holds the Abraser
Vacuum unit and includes a built-in exhaust system to provide
the proper air circulation. Ample room is available to store
test specimens, supplies, and accessories. |
| Built
for laboratory or production settings. |
| The
Quiet Cabinet provides a convenient, dust-free workspace
for your Taber® Abraser. Constructed with solid
wood, a high-pressure laminate outer shell is used for added
durability. Aesthetically pleasing, the Quiet Cabinet blends
with any laboratory or manufacturing environment. |
| |
|
 |
| Taber®
Abrading Wheels |
| Taber®
abrading wheels produce characteristic rub wear action. |
|
Two abrasive wheels create the circular wear path recognized
as a Taber® Rotary Abraser test. As specimens are subjected
to the rub-wear action of the wheels, the abrasion marks
form a pattern of crossed arcs resulting in a circular ring.
This process abrades the sample over all angles of grain
or weave, and covers approximately 30 square centimeters. |
| Analytical
grade abrasive materials ensure test repeatability. |
|
The composition of Taber® abrading wheels has been carefully
chosen and a rigorous quality program maintains the uniformity
of the wheels. Used in pairs, each wheel is labeled left
or right to assure the mounting position will be duplicated
should the wheels be removed and later reinstalled. The
wheels should be refaced according to recommended practice,
and can be used to their minimum usable diameter of 45mm
(1¾ inch) O.D. |
| Offered
in a range of abrasiveness for a range of material evaluation. |
|
The choice of abrading wheels should be based upon the wear
the specimen material will be subjected to in actual use.
Calibrase® wheels are a resilient type, typically used to
test rigid specimens. Calibrade® wheels are vitrified, and
are often used to evaluate flexible specimens. Other wheels
are available for specific or unique applications, and custom
formulations can be developed upon request. |
|
|
| |
|
 |
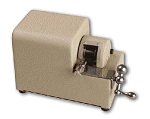
| Wheel
Refacer Model 250 - Taber® Abraser Wheel Resurfacing |
| Resurface
Taber® abrading wheels with precision. |
|
The Model 250 Wheel Refacer is recommended to refresh the
contact surfaces of Calibrade® wheels. This instrument can
also be used to true out of round wheels and correct crowning
conditions on both Calibrase® and Calibrade® wheels. |
| Rugged
design is built to last. |
|
The refacing diamond is mounted in an adjustable diamond
tool holder, which is supported on a shielded traverse slide.
Abrading wheels are mounted on a flanged extension of the
motor shaft. A durable, cast housing provides ample weight
to prevent chatter during operation. Attaching the Taber®
Abraser vacuum unit hose to the rear receptacle draws off
abrasive cuttings. |
| |
|
 |
| Test
Accessories |
| Record
test details on each specimen. |
|
Specimen mounting cards (S-36 and S-36-1) provide a unique
way to capture pertinent test data on each specimen. On
the back of smooth card stock is a printed test report that
enables critical information to be recorded. A pressure
sensitive adhesive makes these cards ideal to mount flexible
specimens. Plus, they prevent the formation of wrinkles
caused by the rub-action of the abrading wheels. Mounting
cards are offered in 4¼
inch (108mm) square or round formats. |
| Mounting
sheets provide non-slip attachment. |
|
Coated on both sides with a pressure sensitive adhesive,
specimen mounting sheets (S-37 and S-37-1) permit the testing
of samples without a centre hole. The adhesive sheet allows
you to affix specimens directly to a specimen table that
does not have the mounting screw. One side consists of a
printed test report, permitting use of the sheet as a mounting
card. Mounting sheets are offered in 4¼
inch (108mm) square or round formats. |
|
Specimen plates enable the testing of coatings. |
|
Taber® offers a selection of specimen plates
to assist with the evaluation of coatings. Different substrates
permit testing based on the usage of the product, and include:
wood, steel, aluminum, zinc, glass, and plastic. |
|
|
| |
|
 |
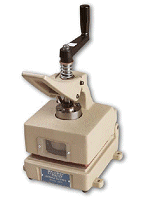
| Sample
Cutter Model 5000 - Specimen Preparation |
| Precision
cut specimens for the Taber® Rotary Abraser or Shear/Scratch
Tester. |
|
Precision cut specimens for the Taber® Rotary Abraser or
Shear/Scratch Tester. The Model 5000 Sample Cutter is designed
to cut an exact 4.2 inch (107mm) diameter specimen and punch
a ¼ inch (6.5mm)
center hole. An optional pad allows you to cut materials
in thickness up to ¼
inch (6.5mm). |
| Rugged
design incorporates safety features. |
|
The rear support prevents tip over, thus eliminating the
need to secure the instrument to a worksurface. A shielded
punch shaft and knife retraction protect the operator from
the center punch and cutting blade. The punch lever is ergonomically
designed to evenly transfer force through the spring loaded
punch. |
| Prepare
a wide range of products. |
|
The heavy duty cutting blade works on a variety of materials
including: paper, cardboard, rubber, leather, vinyl, linoleum,
carpet, textiles, thin metals, flexible plastics, plus many
others. |
| |
|
 |
| Specimen
Tables - Taber® Abraser Mounting Options |
|
Standard table satisfies most applications. |
|
The specimen table equipped with the Taber® Abraser
has been designed to work with most materials. This 4¼
(108mm) diameter table includes a clamp plate and nut to
test rigid materials, and a specimen hold-down ring (E100-101)
to be used for flexible materials. A rubber pad (S-19) is
provided to ensure a non-slip surface. |
|
Different configurations designed for specific materials. |
|
To expand the versatility of the Taber® Abraser, interchangeable
specimen tables are available to evaluate materials not
easily tested with the standard table. Engineered with a
spring clutch, all tables lock onto the motor shaft to prevent
shifting during testing but can easily be removed for specimen
inspection or to clean the motor shaft cavity. |
|
 |
|
Test
Material
|
Model
|
Specimen
Holder Description |
Specimen
Size
|
Test
Conditions
|
|
Rigid,
flat
|
E100-125
|
Standard
test most rigid or flexible specimens (use with E100-101 or
102 Hold Down Ring) |
4
(100mm) square, or 4¼
(108mm) diameter, with ¼
(6.5mm) centre hole*
|
Dry
|
|
Rigid,
flat
|
E140-75
|
Rimmed
a 3/8
(9.5mm) raised rim retains liquids, allowing you to determine
the effect of absorbed and / or surface moisture on abrasion resistance |
4
(100mm) square, or 5½
(140mm) diameter, with ¼
(6.5mm) centre hole*
|
Wet
|
|
Rigid,
warped
|
E140-21
|
NEMA
Threaded Ring incorporates a clamp plate and flanged clamp
ring to test slightly warped specimens, ring is threaded to the
body of the holder which secures the outer edges of the specimen
|
4
(100mm) square, or 53/8
(135mm) diameter, with ¼
(6.5mm) centre hole*
|
Dry
|
|
Rigid,
warped
|
E140-14
|
Ring
Clamp eight (8) screws spaced evenly on the clamp plate
allows you to test slightly warped specimens; furnished with (S)
or without (NS) center screw |
53/8
(135mm) diameter, with ¼
(6.5mm) centre hole*
|
Wet
or Dry
|
|
Rigid,
square
|
E140-19
|
Drive-Pin
Type used for rigid, square specimens without the need for
a centre hole, attach specimens using S-37 or S-37-1 mounting
sheets |
4
(100mm) square
|
Dry
|
|
Flexible
|
E-3945
|
Multiple
Specimen divided into eight (8) sections, holder permits
simultaneous testing of lightweight, flexible specimens |
Cut
to template
|
Dry
|
|
Flexible
|
E140-15
|
Textile,
Tensioning Type incorporates a raised wear track to provide
extra tensioning to the material when the hold down ring is drawn
down over the edge of the holder and the clamp plate is mounted.
|
5¼
(135mm) diameter, with ¼
(6.5mm) centre hole
|
Dry
|
|
Flexible
|
E140-18
|
Textile,
Rimmed provides an initial stretch to woven fabrics, thereby
minimizing the tendency to wrinkle if tested wet |
6¼
(160mm) diameter, with ¼
(6.5mm) centre hole
|
Wet
or Dry
|
|
Flexible
|
E100-10
|
Transparent
Plastic enables textile specimens to be viewed against a
light source to determine wear characteristics without having
to remove the specimen from the holder (use with E100-101 or 102
Hold Down Ring) |
5¼
(135mm) diameter, with ¼
(6.5mm) centre hole
|
Dry
|
|
Flexible
|
E100-101
|
Hold
Down Ring ID 4¼
(108mm) for flexible materials up to 1/32
(0.8mm) thick |
|
|
|
Flexible
|
E100-102
|
Hold
Down Ring ID 4 5/16
(110mm) for flexible materials up to 1/16
(1.5mm) thick |
|
|
|
|
S-21
|
Extension
Nut use when sample thickness is ¼
(6.5mm) to ½ (12.5mm),
requires 3/8
(9.525mm) centre hole |
|
|
|
Notes:
|
|
Use hold down ring and clamp plate for flexible specimens so
vacuum does not lift specimen.
|
|
*
When using S-21 Extension Nut, centre hole must be 3/8"
(9.525mm).
|
www.elcometer.com
|